
Tulip One-Step Tie Dye is a user-friendly kit for crafting vibrant, unique designs. Perfect for beginners, it offers a fun, creative way to achieve impressive results easily.
Overview of Tie Dye Tulip Kits
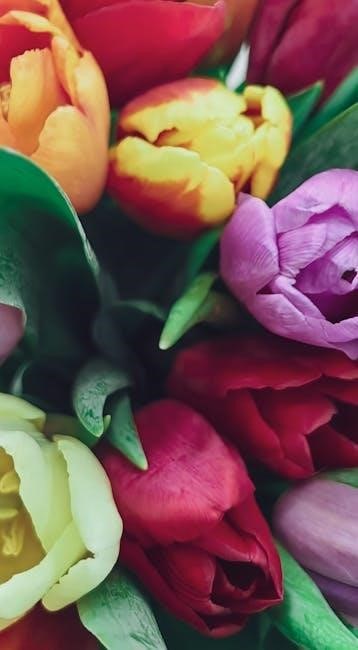
Tulip One-Step Tie Dye Kits are versatile and beginner-friendly, offering pre-measured dye powders in easy-to-use bottles. These kits simplify the tie-dye process, requiring minimal preparation. They include everything needed to create vibrant designs on fabrics like cotton, silk, and wool. With a range of colors, the kits allow for endless creativity, making them ideal for both simple and complex tie-dye projects. Perfect for crafting unique clothing, accessories, or home decor items.
Importance of Following Instructions
Following the instructions carefully ensures vibrant, long-lasting colors and even dye distribution. Proper preparation, mixing, and application techniques prevent uneven results. Deviating from guidelines can lead to faded or inconsistent designs. By adhering to the steps, you achieve professional-looking tie-dye projects with minimal effort. This attention to detail enhances both the appearance and durability of your creations, making the process rewarding and successful.
Materials Needed for Tie Dye Tulip
Gather Tulip One-Step Dye bottles, fabric, rubber bands, gloves, and protective coverings. These essentials ensure a safe and successful tie-dye experience for all projects.
Tulip One-Step Dye Bottles
Tulip One-Step Dye bottles are convenient and pre-measured, containing dye powder. Simply add water to the fill line, shake well, and apply. Use one color or mix for unique effects. Ensure gloves are worn during use to avoid skin staining. These bottles simplify the dyeing process, offering vibrant results with minimal effort. Always follow package instructions for best outcomes and safety.
Fabric Preparation Tools
Essential tools for fabric preparation include a washing machine, dryer, and plastic wrap or trash bags to separate fabric layers. Prewash fabric to remove finishes and ensure dye adhesion. For wet techniques, use directly from the washer; for dry, dry fabric first. Optional tools like buckets or squeeze bottles can aid in applying dye evenly. Proper preparation ensures vibrant, long-lasting colors and professional results.
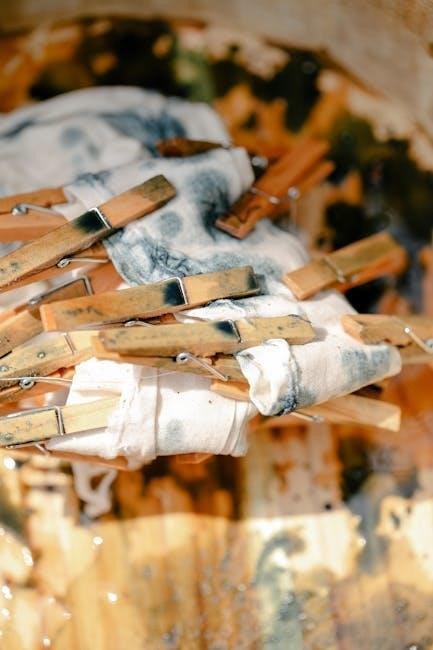
Rubber Bands and Gloves
Rubber bands are crucial for securing fabric folds, creating resistance areas that allow the dye to form unique patterns. Tighter bands yield sharper designs. Gloves protect skin from staining and prevent dye from adhering to fingertips. They also make cleanup easier, ensuring a safer and more controlled dyeing process. Using both tools enhances creativity and safety, making the tie-dye experience more enjoyable and efficient for crafters of all skill levels.
Preparation Steps for Tie Dye Tulip
Preparation involves prewashing fabric to remove finishes, drying it thoroughly, and layering with plastic wrap or bags to prevent dye spread during the tie-dye process.
Prewashing Fabric
Prewashing fabric is essential to remove any finishes or residues that might interfere with dye absorption. Wash the fabric in warm water without fabric softener or bleach. This step ensures the dye adheres evenly and vibrant colors develop. Gently squeeze out excess water, but do not dry completely—fabric should be damp for the tie-dye process. This preparation step is crucial for achieving the best results with Tulip One-Step Dyes.
Drying Fabric Before Dyeing
Drying fabric after prewashing is crucial for optimal dye absorption. Excess moisture can dilute the dye, leading to uneven results. Allow the fabric to air-dry or gently pat it with a towel, ensuring it remains damp but not soaking wet. Tulip One-Step Dyes work best on damp fabric, as it allows the dye to spread evenly and penetrate deeply. Proper drying ensures vibrant, consistent colors in your tie-dye project.
Mixing Tulip One-Step Dyes
Each Tulip dye bottle contains powder; add tap water to the fill line, shake well, and mix thoroughly for vibrant, consistent colors in your project.
Following Package Instructions
Always follow the Tulip One-Step Dye package instructions for optimal results. Each bottle contains dye powder; add tap water to the fill line, secure the cap tightly, and shake until fully dissolved. Ensure no powder remains undissolved for consistent color. Allow the mixture to sit briefly before applying to fabric. Proper mixing ensures vibrant, even colors in your tie-dye project.
Adding Water to Dye Powder
For Tulip One-Step Dyes, fill each bottle with tap water to the marked line. Replace the nozzle and shake thoroughly until the dye powder dissolves completely. This ensures a uniform consistency and prevents uneven color application. Mixing correctly is crucial for achieving the desired shades and patterns in your tie-dye project, so always follow the specified water level for best results.
Binding Techniques for Tie Dye Tulip
Selecting the appropriate fold is essential for achieving desired patterns. From simple accordion folds to intricate twists, each technique yields unique designs, ensuring creativity in every project.
Choosing the Right Fold
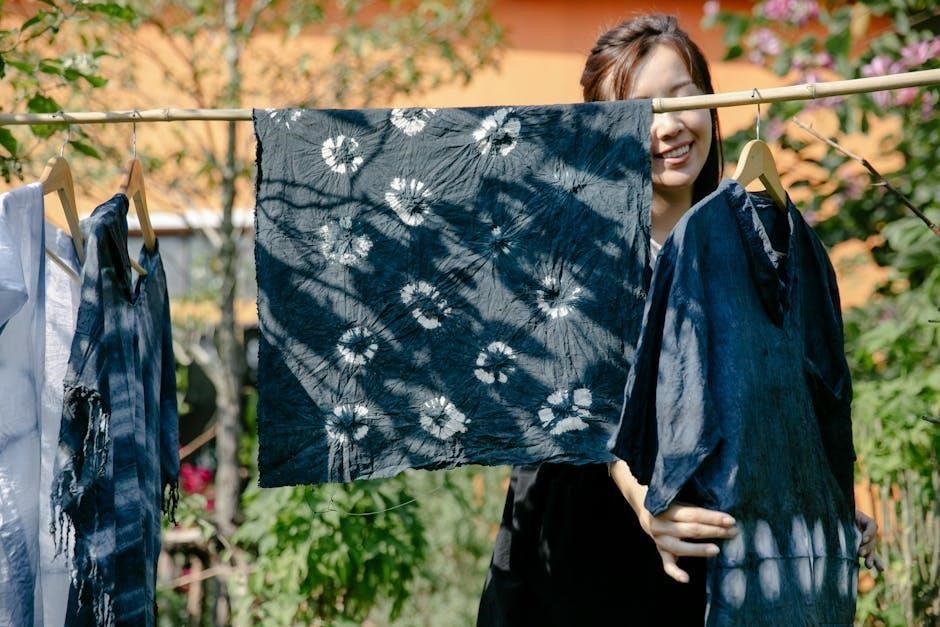
Choosing the right fold is crucial for achieving unique tie-dye patterns. Techniques like the swirl, sunburst, or bullseye create distinct designs. The Itajime fold involves folding fabric into shapes for resist effects. Each fold determines how dye penetrates, making it essential to select based on desired outcomes. Proper folding ensures vibrant, evenly distributed colors, enhancing the overall aesthetic of your tie-dye project.
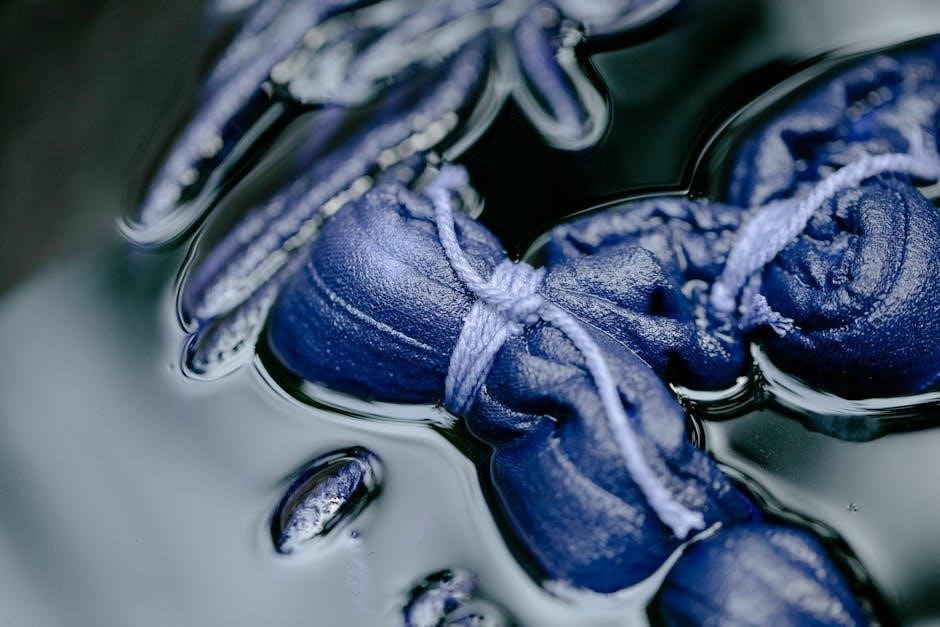
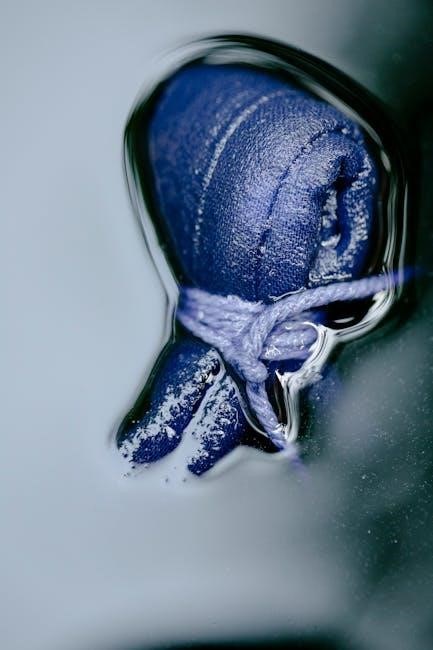
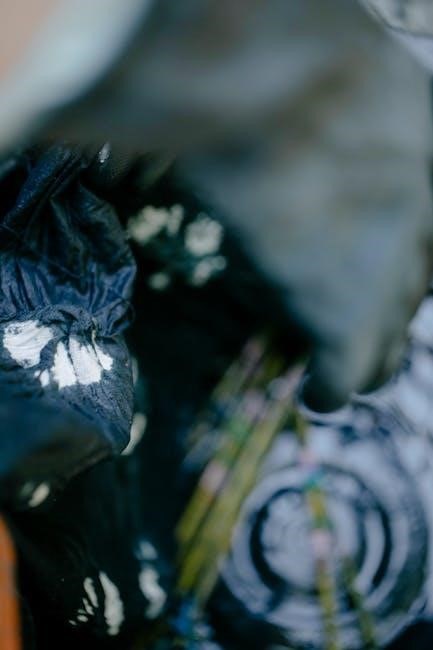
Securing Fabric with Rubber Bands
Securing fabric with rubber bands is essential for creating resist areas in tie-dye. Tight bands prevent dye penetration, forming sharp lines, while looser bands allow partial penetration for softer effects. Folded fabric is wrapped tightly with bands to achieve desired patterns like bullseye or spiral. Proper band placement ensures vibrant, defined colors, making rubber bands a key tool in achieving unique, professional-looking tie-dye designs with Tulip kits.
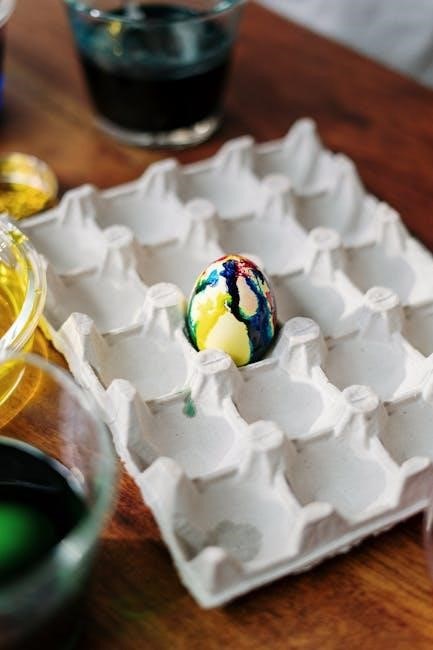
Applying Tulip One-Step Dyes
Apply Tulip One-Step Dyes evenly to folded or bound fabric. Use one color for a solid look or mix multiple colors for vibrant, multi-tonal effects.
Using One or Multiple Colors
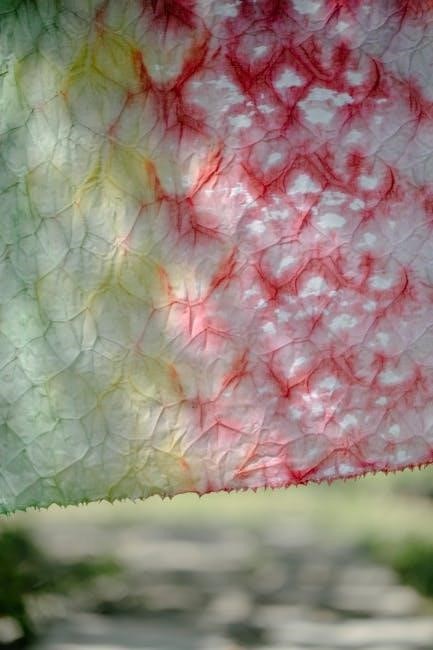
For a solid look, apply one Tulip One-Step Dye color evenly. For multi-tonal effects, layer or blend multiple colors. Experiment with vibrant combinations for unique designs. Ensure even coverage to avoid uneven results. When using multiple colors, apply them sequentially, allowing each to saturate the fabric before adding the next. This technique creates striking, professional-looking tie-dye patterns. Always follow package instructions for optimal color vibrancy and lasting results.
Ensuring Even Dye Application
To achieve consistent results, apply Tulip One-Step Dyes evenly across the fabric. Use the squeeze bottles to distribute the dye uniformly, ensuring full coverage. For multi-color designs, layer colors carefully to prevent over-saturation. Gently pat excess dye with a clean cloth if needed. Proper folding techniques and even application ensure vibrant, balanced patterns. Allow the dye to set as instructed for optimal color penetration and lasting results. This step is crucial for professional-looking tie-dye projects.
Setting the Dye
Let the dye set for 6-8 hours, or ideally 24 hours in a warm environment like 70°F, for better color development. This ensures even penetration and vibrant results.
Recommended Setting Time
The ideal setting time for Tulip One-Step Dyes is between 6 to 8 hours. For optimal results, allowing the dye to set for 24 hours in a warm environment, around 70°F, is recommended. This extended period ensures deeper color penetration and more vibrant hues. Proper setting is crucial for achieving professional-looking tie-dye designs with long-lasting color retention.
Optimal Temperature for Color Development
The ideal temperature for color development when using Tulip One-Step Dyes is around 70°F. A warm environment helps the dye bind effectively to the fabric, ensuring vibrant and lasting colors. Avoid extreme heat or cold, as this can disrupt the dye’s ability to set properly. Maintaining a consistent, moderate temperature during the setting process is key to achieving professional-looking results and preventing color fading.
Rinsing and Washing
Rinse gently under cold water to remove excess dye. Hand wash in cold water with mild detergent. Wash separately first to preserve vibrant colors.
Initial Rinsing After Setting
Gently rinse the fabric under cold running water to remove excess dye. Use mild detergent if necessary, but avoid scrubbing. Rinse until water runs clear. Handle fabric carefully to prevent color bleeding. This step ensures the dye sets properly and prevents fading. Avoid wringing or twisting, as this can damage fibers or disrupt color bonding. Proper rinsing is key for long-lasting, vibrant results.
Washing Instructions for Tie Dye Projects
Turn the garment inside out and wash in cold water using a gentle detergent. Avoid using bleach or harsh chemicals. A mild cycle is recommended to protect colors. Do not soak for extended periods. Air-dry the fabric or tumble dry on a low setting. Avoid fabric softeners, as they can affect color vibrancy. For best results, wash similar colors together to prevent bleeding. Proper care ensures the tie-dye design remains vibrant and long-lasting.
Advanced Tie Dye Techniques
The Itajime fold creates unique, geometric patterns by binding fabric between two pieces of cardboard. This Japanese method resists dye in structured areas, producing sharp, clean designs.
Swirl, Sunburst, and Bullseye Methods
The Swirl method involves twisting fabric into a spiral shape before applying dye, creating a vibrant, circular pattern. The Sunburst technique folds fabric into accordion pleats, resulting in radiating color lines. The Bullseye method involves folding fabric into concentric rings, producing a target-like design. These techniques require precise folding and even dye application to achieve striking, professional-looking results. Each method offers a unique way to express creativity in tie-dye projects.
Itajime Fold Technique
The Itajime Fold Technique involves folding fabric into shapes like squares or triangles, then binding with rubber bands to create resistance areas for dye. This method produces sharp, geometric patterns with clear lines. By layering folds, you can achieve intricate designs. After folding, apply Tulip One-Step Dyes evenly, ensuring the folded sections resist dye penetration. Allow the dye to set for 6-8 hours for vibrant, symmetrical results. This technique is ideal for those seeking precise, modern tie-dye designs.
Troubleshooting Common Issues
Common issues include uneven color distribution and dye bleeding. Fix by ensuring even dye application and following setting times. Wash separately initially to prevent color transfer.
Fixing Uneven Color Distribution
Uneven color distribution can occur due to inconsistent dye application or inadequate folding. Ensure fabric is evenly bound with rubber bands and dye is applied thoroughly on both sides. Allow the dye to set for the recommended 6-8 hours to maximize color penetration. If colors appear uneven after rinsing, gently agitate the fabric during the first wash to redistribute the dye evenly.
Addressing Color Bleeding
To minimize color bleeding, rinse the fabric gently after the dye sets, using cold water to remove excess dye. Wash tie-dye projects separately from other clothes initially. Adding a vinegar rinse during the first wash can help set colors and reduce bleeding. Avoid using hot water, as it can cause colors to fade or bleed more. Proper washing techniques ensure vibrant, long-lasting results.
Safety Tips for Tie Dye Tulip
Protect your skin with gloves and old clothing. Cover work surfaces with plastic or newspaper to prevent stains. Work in a well-ventilated area to avoid inhaling dye fumes.
Protecting Skin and Surfaces
Always wear gloves to prevent skin staining and use old clothing to avoid damage. Cover workspaces with plastic or newspaper to shield surfaces from dye spills. Ensure the area is well-ventilated to minimize exposure to dye fumes. These precautions ensure a safe and enjoyable tie-dye experience for everyone involved in the project.
Working in a Well-Ventilated Area
Ensure your workspace is well-ventilated to avoid inhaling dye fumes. Open windows or use a fan to circulate air, preventing the buildup of potentially harmful vapors. This precaution enhances safety and comfort while working with Tulip One-Step Dyes, ensuring a pleasant and hazard-free tie-dye experience.
Tie-dye tulip instructions offer a creative, enjoyable process. Follow steps carefully for vibrant results. Experiment with colors and folds to achieve unique designs. Happy crafting!
Final Tips for Successful Tie Dye
For best results, always prewash fabric and follow Tulip One-Step Dye instructions. Apply dye evenly, ensuring both sides are covered. Secure fabric tightly with rubber bands for crisp patterns. Allow projects to set 6-8 hours or overnight for vibrant colors. Wash gently after rinsing to preserve designs. Experiment with folds and colors for unique effects. Practice safety by wearing gloves and working in a well-ventilated space. Happy crafting!