Army OCP Uniform Guide: A Comprehensive Overview
Army Regulation 670-1 dictates uniform standards, including the Operational Camouflage Pattern (OCP). The OCP became the standard wear on November 1, 2025, replacing the ABU.
The Operational Camouflage Pattern (OCP) uniform represents a significant shift in the U.S. Army’s approach to camouflage and standardization. Introduced as the primary utility uniform on November 1, 2025, per Army Regulation 670-1, the OCP aims to provide a versatile and effective camouflage solution across a wide range of operational environments. This transition marked the phasing out of the previously utilized Army Battle Uniform (ABU), with a complete phase-out scheduled for October 31, 2028.
The OCP isn’t merely a change in pattern; it’s a comprehensive system encompassing specific guidelines for wear, insignia placement, and accessory compatibility, all meticulously detailed within Army regulations. Understanding these regulations is crucial for all personnel to ensure proper and authorized wear of the uniform, maintaining a disciplined and professional appearance. The OCP’s design and implementation reflect the Army’s commitment to adaptability and readiness in modern warfare.
What is the OCP Uniform?
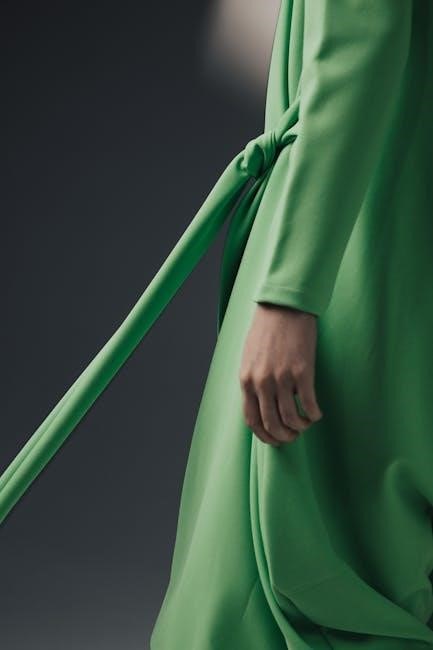
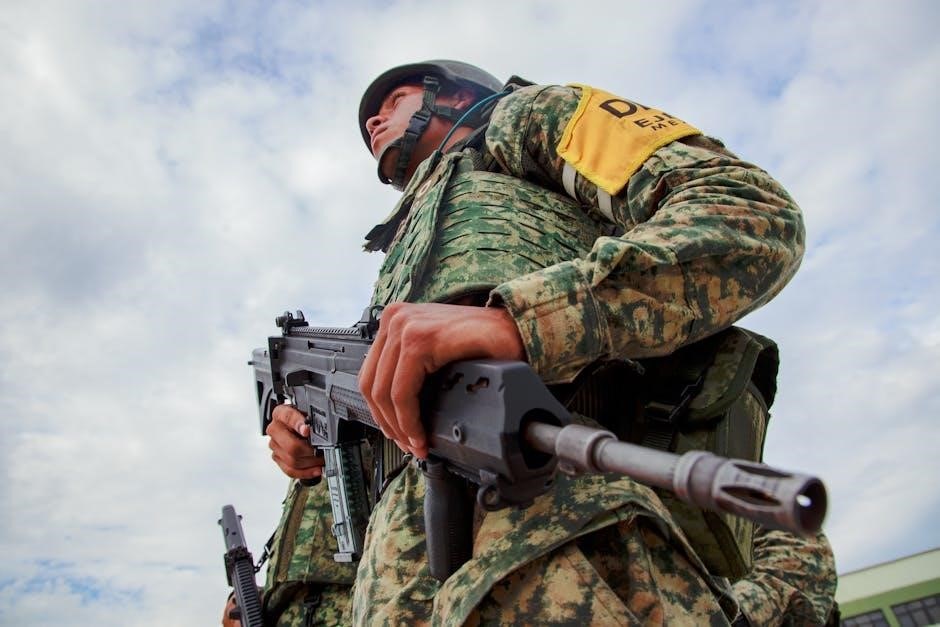
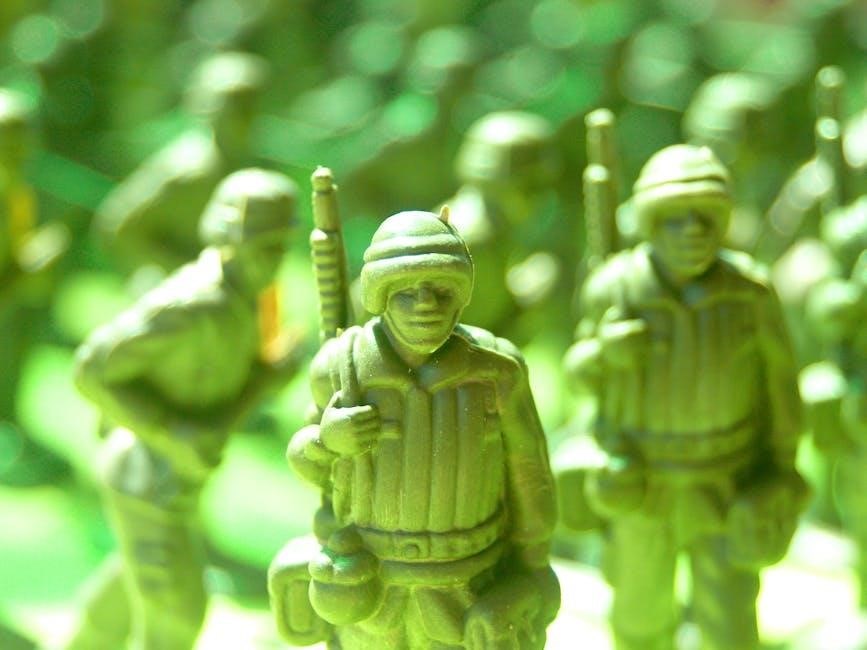
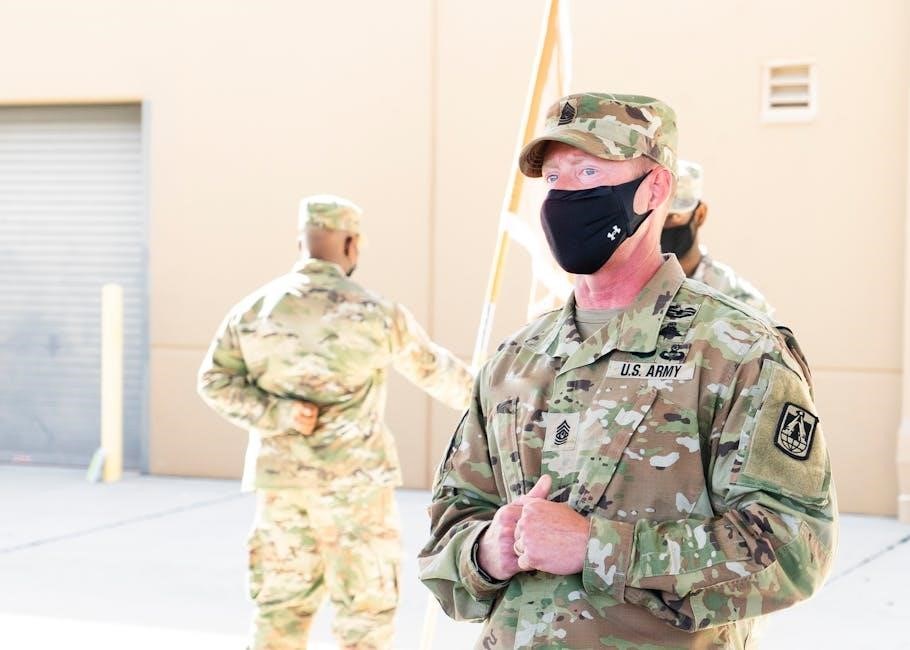
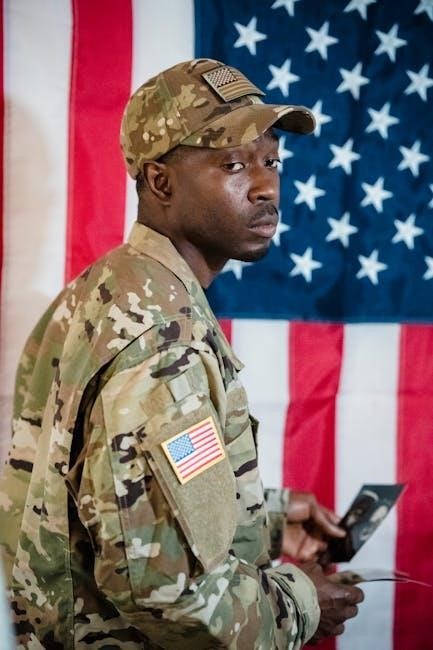
The Operational Camouflage Pattern (OCP) uniform is the current standard issue combat uniform for the U.S. Army, Army National Guard, and Army Reserve. It’s characterized by a multi-terrain camouflage pattern designed for effectiveness across diverse environments. The OCP consists of a coat, trousers, moisture-wicking t-shirt, and authorized combat boots, all adhering to strict standards outlined in Army Regulation 670-1.
Unlike its predecessor, the ABU, the OCP utilizes a more muted and versatile color palette. It’s designed to blend effectively in wooded, desert, and transitional environments. Proper wear includes specific guidelines for rank and name tape placement, insignia attachment, and authorized accessories. The OCP is more than just clothing; it’s a symbol of unit cohesion and professional military bearing, demanding adherence to established regulations for a consistent and disciplined appearance across all ranks.
History of the OCP Transition
The transition to the Operational Camouflage Pattern (OCP) uniform was a significant shift for the U.S. Army, driven by a need for a more effective and versatile camouflage solution. Initially introduced for testing in 2016, the OCP gradually replaced the previously mandated Army Battle Uniform (ABU). The official implementation date for mandatory wear was November 1, 2025, as authorized by updates to Army Regulation 670-1.
This transition wasn’t immediate; a coexistence period allowed soldiers to utilize existing ABU uniforms while acquiring OCP attire. The complete phase-out of the ABU is scheduled for October 31, 2028. This phased approach minimized financial burden and logistical challenges. The move to OCP aimed to improve soldier concealment and overall operational effectiveness, reflecting lessons learned from recent combat experiences and advancements in camouflage technology, ultimately enhancing the Army’s capabilities.
Understanding AR 670-1 Regulations
Army Regulation 670-1 is the definitive guide for uniform wear and appearance, covering everything from insignia placement to grooming standards for all Army personnel.
AR 670-1: The Definitive Guide
Army Regulation 670-1 serves as the cornerstone for maintaining a professional military appearance across all components of the U.S. Army – Active Duty, Army National Guard, and Army Reserve. This comprehensive regulation meticulously details the authorized wear of Army uniforms and insignia, ensuring uniformity and discipline throughout the ranks. It’s not merely a set of rules, but a guide to projecting a cohesive and credible image.
The regulation covers a vast spectrum of topics, from the correct placement of rank and name tapes to the authorized wear of badges, ribbons, and shoulder sleeve insignia. Crucially, AR 670-1 also addresses grooming standards, ensuring Soldiers present a neat and professional appearance at all times. It dictates specifics regarding hairstyles, facial hair, and the wearing of jewelry.
Furthermore, the regulation is regularly updated to reflect changes in uniform policy, such as the recent transition to the Army Green Service Uniform and the implementation of guidance for the Operational Camouflage Pattern (OCP). Understanding and adhering to AR 670-1 is paramount for every Soldier.
Key Updates to AR 670-1 (as of 01/26/2026)
As of January 26, 2026, AR 670-1 incorporates significant updates impacting uniform wear, particularly concerning the Operational Camouflage Pattern (OCP). Chapters 13 and 14 now include detailed guidance on the Army Green Service Uniform and its maternity variations, clarifying authorized components and wear. Expansions to paragraph 20-2 provide more comprehensive rules for carrying bags, backpacks, handbags, and purses while in uniform.
Notably, the regulation now explicitly authorizes the Improved Hot Weather Combat Uniform, offering Soldiers increased comfort in warm climates. Policy regarding the new Army Green Service Uniform is fully implemented within Chapters 14 and 15, detailing proper wear and appearance. Guidance on shoulder sleeve insignia for military operations in hostile conditions has been added (para 21-18).
Finally, AR 670-1 expands authorization for Ranger-qualified Soldiers to wear the tan beret, acknowledging their specialized training and contributions.
Applicability of AR 670-1
Army Regulation 670-1, alongside Department of the Army Pamphlet 670-1, establishes the definitive standards for uniform design, appearance, wear, and issue across all components of the U.S. Army. This encompasses the Active Army, the Army National Guard, the Army National Guard/Army National Guard, and even State Defense Forces, ensuring a consistent and professional image throughout the entire force.
The regulation’s broad applicability means all personnel, regardless of rank or component, are subject to its guidelines regarding the Operational Camouflage Pattern (OCP) and other authorized uniforms. It dictates everything from the correct placement of insignia to acceptable grooming standards.
This pamphlet serves as a comprehensive guide, ensuring all Soldiers understand and adhere to the established protocols for presenting a disciplined and unified appearance, upholding the traditions and standards of the U.S. Army.
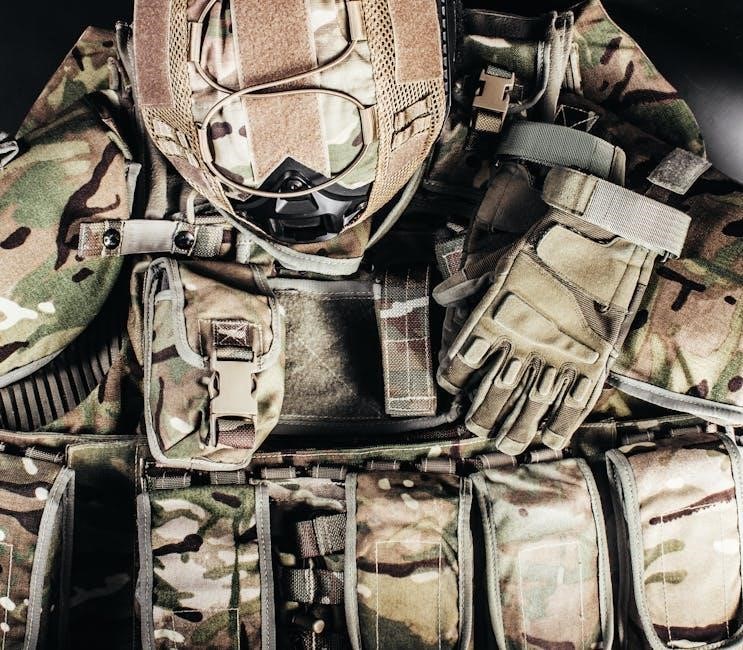
Components of the OCP Uniform
The OCP uniform consists of a coat, trousers, approved combat boots, and a moisture-wicking t-shirt; all adhering to AR 670-1 specifications for wear.
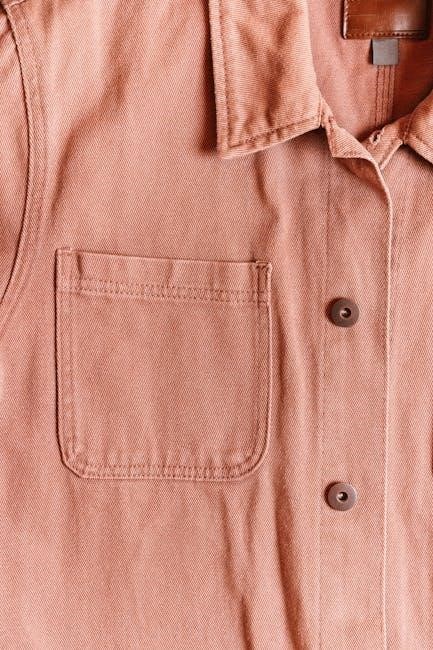
OCP Coat – Features and Specifications
The Operational Camouflage Pattern (OCP) coat is designed for durability and functionality, adhering strictly to Army Regulation 670-1 standards. Constructed from 50/50 nylon-cotton ripstop fabric, it offers both comfort and resistance to tearing. Key features include reinforced elbows for increased wear resistance, adjustable cuffs for a secure fit, and multiple pockets strategically placed for essential gear storage.
The coat’s cut allows for freedom of movement, crucial for operational effectiveness. It features button closures, and is designed to accommodate authorized patches and insignia according to regulation. Specific attention is given to the placement of rank and name tapes, as well as shoulder sleeve insignia. The OCP coat is intended to be worn with the OCP trousers and appropriate footwear, creating a cohesive and professional appearance. Proper fit and adherence to AR 670-1 are paramount for all personnel.
OCP Trousers – Design and Fit
The OCP trousers, integral to the Army’s modernized uniform system, are crafted from the same 50/50 nylon-cotton ripstop fabric as the coat, ensuring consistency and durability. Designed for optimal performance in diverse environments, these trousers feature a slightly relaxed fit allowing for comfortable movement and layering with undergarments. They incorporate reinforced seat and knee areas to withstand rigorous activity and abrasion.
Multiple cargo pockets with button closures provide ample storage for essential equipment. Adjustable waist tabs and drawstrings at the bottom of the legs allow for a customized and secure fit. Like the coat, the trousers are designed to accommodate proper insignia placement as dictated by Army Regulation 670-1. Maintaining a professional appearance through correct fit and adherence to regulations is crucial. The trousers are intended for wear with the OCP coat and approved combat boots.
OCP Combat Boots – Approved Styles
Army Regulation 670-1 outlines specific requirements for combat boots worn with the OCP uniform, emphasizing functionality, durability, and a professional appearance. Currently approved styles generally include coyote brown boots meeting established standards for height, tread, and construction. Soldiers are expected to maintain their boots in a clean and serviceable condition, ensuring laces are properly tied and boots are free from excessive wear and tear.
While specific brand approvals can evolve, boots must adhere to the regulation’s stipulations regarding ankle support and sole composition. The regulation details acceptable variations, such as hot weather boots, but all must align with the coyote brown color scheme. Proper boot selection and maintenance are vital for Soldier comfort, performance, and adherence to Army standards. Regularly checking for updates to approved boot lists is recommended, as per AR 670-1 guidelines.
OCP Moisture-Wicking T-Shirt – Undergarment Requirements
Army Regulation 670-1 specifies that the authorized undergarment worn with the OCP uniform is a moisture-wicking t-shirt, typically in coyote brown or black. This requirement aims to enhance Soldier comfort and performance by regulating body temperature and drawing moisture away from the skin, particularly during strenuous activity. The t-shirt must be plain, without any graphics or logos, and should fit snugly but not restrict movement.
Acceptable materials include polyester or blends designed for moisture management. Soldiers are prohibited from wearing cotton t-shirts as undergarments with the OCP uniform due to cotton’s tendency to retain moisture and cause discomfort. Proper undergarment selection contributes to overall hygiene and prevents chafing. Adherence to these guidelines, as detailed in AR 670-1, ensures a professional appearance and maximizes Soldier well-being during training and operations.
Proper Wear of the OCP Uniform
Army Regulation 670-1 governs OCP uniform wear, detailing rank and insignia placement, authorized headgear, and overall appearance standards for all personnel.
Wearing the OCP Uniform Correctly
Adhering to Army Regulation 670-1 is crucial for the correct wear of the Operational Camouflage Pattern (OCP) uniform. Proper fit is paramount; the uniform shouldn’t be excessively tight or loose, allowing for comfortable movement during duties. The OCP coat must be worn buttoned, except when participating in physically strenuous activities.
Soldiers are expected to maintain a neat and professional appearance at all times. This includes ensuring the uniform is clean, pressed, and free of excessive wear and tear. The OCP uniform is designed to be worn with appropriate undergarments, and modifications should only be made by authorized personnel. Consistent and correct wear reflects discipline and pride within the ranks, upholding the Army’s standards of professionalism and readiness. Attention to detail in uniform wear demonstrates respect for the uniform and the Army itself.
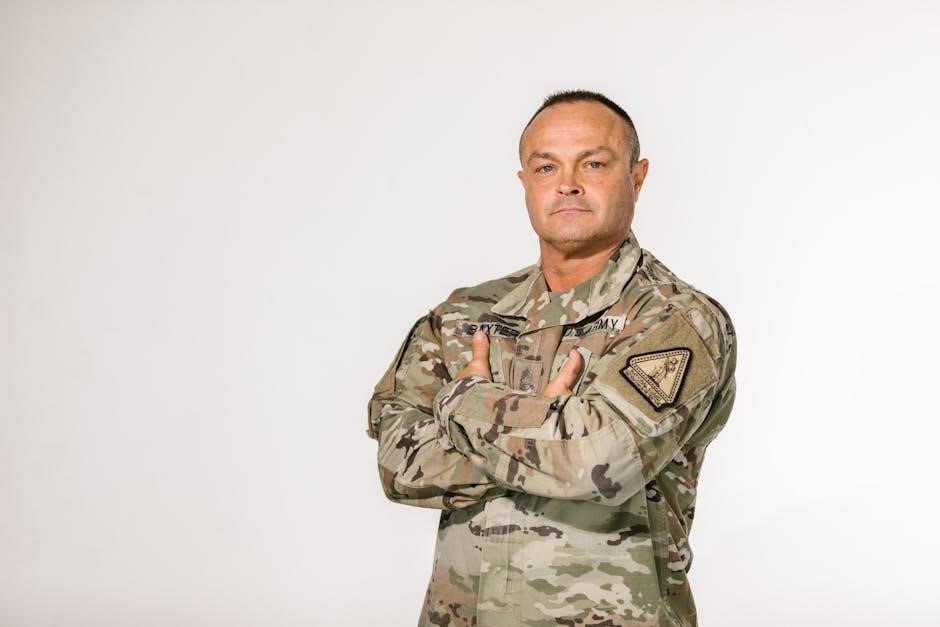
Rank and Name Tape Placement
Army Regulation 670-1 provides specific guidance on rank and name tape placement on the Operational Camouflage Pattern (OCP) uniform. Rank insignia is centered on the collar, one inch from the bottom edge, ensuring visibility and adherence to standards. Name tapes are positioned above the right breast pocket, also centered, with one inch separating the bottom of the tape from the pocket;
Both rank and name tapes must be securely attached using hook-and-loop fasteners. The font and color of the name tapes are prescribed by regulation to maintain uniformity across the force. Proper placement demonstrates attention to detail and adherence to Army standards. Incorrect placement can result in corrective action. Maintaining these standards ensures a professional appearance and reflects discipline within the ranks, contributing to the overall cohesion and readiness of the unit.
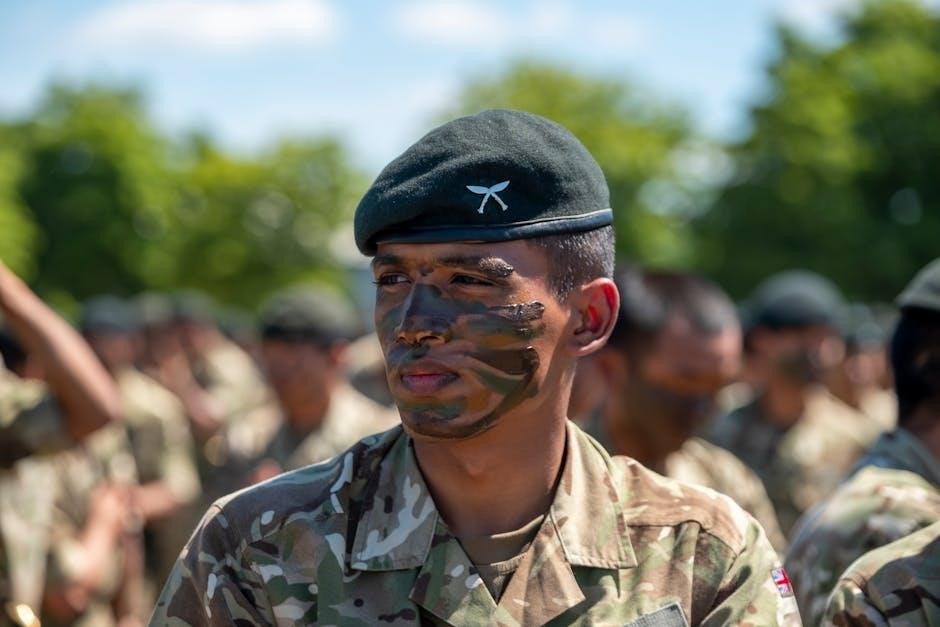
Insignia Placement – Shoulder Sleeves and Patches
Army Regulation 670-1 details the precise placement of shoulder sleeve insignia and patches on the Operational Camouflage Pattern (OCP) uniform. The full color U.S. flag patch is worn on the left shoulder, centered and secured with hook-and-loop fasteners. Unit patches are affixed to the right shoulder, also centered, following the same attachment method.
Placement must allow for clear visibility of all insignia. Special operation patches or those denoting specific qualifications are positioned according to established guidelines, often above the unit patch. Proper adherence to these regulations ensures uniformity and accurately represents a Soldier’s unit affiliation and achievements. Incorrect placement can detract from the professional appearance and may be subject to correction. Maintaining these standards reinforces discipline and pride within the Army.
Authorized Headgear with OCP
Army Regulation 670-1 specifies authorized headgear worn with the Operational Camouflage Pattern (OCP) uniform. The primary authorized headgear includes the patrol cap (also known as the “baseball cap”), and the beret for designated personnel, such as Rangers who are authorized to wear the tan beret. During inclement weather, Soldiers may wear authorized cold-weather headgear, like watch caps, that complement the OCP’s camouflage pattern.
Headgear must be worn correctly, with proper fit and insignia placement. The patrol cap’s insignia mirrors the shoulder patch arrangement. Berets require specific flash placement denoting unit affiliation. Maintaining a neat and professional appearance with authorized headgear is crucial. Unauthorized headgear is prohibited, and adherence to these guidelines ensures uniformity and discipline within the Army ranks, projecting a cohesive and professional image.
Accessories and Additional Items
Army Regulation 670-1 expands guidance on authorized accessories like belts, gloves, bags, and cold-weather gear worn with the OCP uniform for functionality.
Authorized Belts and Gloves
Army Regulation 670-1 provides specific guidance regarding authorized belts and gloves when worn with the Operational Camouflage Pattern (OCP) uniform. The regulation details acceptable colors and materials to maintain a professional and standardized appearance across all ranks; Specifically, the coyote brown belt is the standard authorized belt for wear with the OCP uniform, ensuring consistency and uniformity.
Concerning gloves, the regulation outlines acceptable types for various climates and operational needs. Coyote brown gloves are generally authorized, but other colors may be permitted based on specific mission requirements or environmental conditions. It’s crucial that gloves are in good repair and present a neat and professional appearance. Soldiers are expected to adhere to these guidelines to uphold the Army’s standards of discipline and readiness. Any deviation from these standards requires proper authorization.
Wear of Bags, Backpacks, and Purses
Army Regulation 670-1 has expanded guidance concerning the wear of bags, backpacks, handbags, and purses while in OCP uniform. The regulation aims to balance practicality with maintaining a professional military bearing. Generally, these items are permitted for personal use during off-duty hours or when traveling to and from duty. However, specific restrictions apply during official functions or when representing the Army.
Authorized colors are typically subdued tones that complement the OCP pattern, such as coyote brown, black, or olive drab. Bright or distracting colors are generally prohibited. Backpacks and bags should be worn in a manner that does not interfere with the soldier’s ability to perform their duties or compromise their safety. The regulation emphasizes discretion and good judgment when selecting and wearing these items, ensuring they do not detract from the overall professional appearance of the uniform.
Authorized Cold Weather Gear with OCP
When temperatures drop, soldiers wearing the OCP uniform are authorized specific cold weather gear to maintain operational effectiveness and personal comfort. This gear must adhere to Army Regulation 670-1 guidelines to ensure uniformity and practicality. Authorized items include the Improved Cold Weather Intermediate Layer (ICWIL) jacket and trousers, often worn over the OCP uniform for added insulation.
Furthermore, soldiers can utilize authorized parkas and liners, as well as cold weather boots, gloves, and hats, typically in colors like black or coyote brown to complement the OCP pattern. The regulation emphasizes that cold weather gear should not significantly alter the uniform’s silhouette or impede movement. Layering is encouraged to adapt to varying conditions, and all gear must be in good repair and properly fitted. Proper wear ensures soldiers remain mission-ready even in harsh winter environments, while upholding a professional appearance.
OCP Uniform Maintenance and Care
Maintaining the OCP uniform involves following specific washing, drying, ironing, and repair instructions detailed in Army Regulation 670-1 to prolong its lifespan.
Washing and Drying Instructions
Proper washing and drying are crucial for maintaining the OCP uniform’s appearance and effectiveness. Army Regulation 670-1 provides detailed guidance, emphasizing the use of mild detergents formulated for colored fabrics. Avoid detergents containing bleach or optical brighteners, as these can fade the camouflage pattern.
Wash OCP uniforms inside out in cold water on a gentle cycle. This minimizes fading and protects the fabric. When using a washing machine, separate OCP items from other clothing to prevent color transfer. Tumble dry on low heat or hang to dry. High heat can damage the fabric and cause shrinkage.
Avoid over-drying, as this can also contribute to fading and wear. If ironing is necessary, use a low heat setting and iron on the reverse side of the fabric. Following these instructions will ensure your OCP uniform remains in good condition and meets Army standards.
Ironing and Stain Removal
Maintaining a professional appearance with the OCP uniform often requires ironing and stain removal. When ironing, always use a low heat setting and preferably iron the garment inside out to protect the camouflage pattern from potential damage or discoloration. A pressing cloth can further safeguard the fabric. Avoid steam, as it may affect the uniform’s properties.
For stain removal, address stains promptly. Pre-treat with a mild stain remover specifically designed for colored fabrics, testing it on an inconspicuous area first. Gently blot the stain; avoid harsh scrubbing, which can damage the material. Rinse thoroughly with cold water.
Stubborn stains may require professional cleaning. Remember to adhere to Army Regulation 670-1 guidelines, ensuring the uniform remains presentable and meets required standards. Proper care extends the life of the OCP uniform and maintains a sharp, professional look.
Uniform Repair and Alterations
Maintaining the OCP uniform’s integrity often necessitates repairs and alterations. Minor repairs, such as re-sewing buttons or repairing small tears, can typically be performed by the individual. However, significant alterations or repairs should be completed by a qualified tailor familiar with military uniform regulations.
Alterations must adhere strictly to Army Regulation 670-1, ensuring the uniform maintains its authorized appearance. Avoid modifications that deviate from the standard design. Patches and insignia must be correctly positioned after any alterations. Improper alterations can result in non-compliance and potential corrective action.
Units often have designated personnel capable of performing basic uniform repairs. For complex issues, professional military tailors are recommended. Remember, a well-maintained uniform reflects discipline and pride, upholding the Army’s standards of appearance and professionalism.
Transition Timeline and Phase-Out Dates
The OCP uniform’s implementation began November 1, 2025, with a coexistence period. The Airmans Battle Uniform (ABU) is authorized until its final phase-out on October 31, 2028.
OCP Implementation Date (November 1, 2025)
Army Regulation 670-1 officially authorized the wear of the Operational Camouflage Pattern (OCP) as the standard utility uniform, commencing on November 1, 2025; This date marked a significant shift in Army uniform policy, transitioning away from the previously utilized Army Combat Uniform (ACU) and, subsequently, the Airmans Battle Uniform (ABU).
The implementation wasn’t a sudden, complete switch. Instead, November 1, 2025, initiated a period of coexistence between the OCP and the ABU, allowing Soldiers time to acquire the new uniform and gradually phase out the older pattern. This phased approach aimed to minimize financial burden on personnel and ensure a smooth transition across all Army components – Active Duty, Army National Guard, and Army Reserve.
Prior to the implementation date, guidance was disseminated through official channels to clarify wear policies, authorized accessories, and proper insignia placement on the OCP uniform. This preparatory phase was crucial for ensuring all Soldiers understood the new regulations and presented a consistent, professional appearance.
ABU Phase-Out Date (October 31, 2028)
The Airmans Battle Uniform (ABU), having served as an interim utility uniform during the transition, was officially slated for complete phase-out by October 31, 2028. This date represents the culmination of a multi-year process initiated with the OCP’s authorization on November 1, 2025. After this final date, the wear of the ABU will no longer be permitted within the Army, except under specific, approved waivers for unique circumstances.
The extended phase-out period was strategically implemented to allow Soldiers sufficient time to replace their ABU uniforms with the OCP, mitigating financial strain and logistical challenges. Throughout this period, Soldiers were encouraged to prioritize the acquisition of OCP components as their ABU items reached the end of their serviceable life.
The complete removal of the ABU from the Army’s uniform roster signifies a full commitment to the OCP as the standard utility uniform, ensuring uniformity and a cohesive appearance across all ranks and components of the force.
Coexistence of OCP and ABU
Following the OCP’s authorized wear date of November 1, 2025, a period of coexistence between the OCP and the Airmans Battle Uniform (ABU) was necessary to facilitate a smooth and manageable transition for all Soldiers. This overlapping timeframe acknowledged the practical realities of uniform replacement, recognizing that immediate, complete adoption was not feasible for every individual.
During this coexistence phase, Soldiers were permitted to wear either the OCP or the ABU, providing flexibility while they acquired the necessary OCP components. Units were granted discretion in establishing internal guidelines regarding the preferred uniform within their respective areas of operation, balancing standardization with individual readiness.
This period allowed for a gradual shift in appearance, minimizing disruption and ensuring that Soldiers remained properly equipped throughout the transition. The coexistence ultimately paved the way for the ABU’s eventual phase-out on October 31, 2028, solidifying the OCP as the standard.